
This parameter allows for the definition of another grouping of locations which is independent of the institution associated with a location. For example, although branches A, B, C and D belong to the same organisation in general, for some charges A and B are independent of C and D. An example might be where A is the main library and B is the reference library, perhaps in the same building and sharing financial responsibilities, but which have been configured as separate locations (for some other functional reason within the system).
In addition, financial groups allow for locations to be grouped together for the purposes of access to the online credit card payment module - the philosophy and significance of this is explained within the credit card payments general help.
Financial groups are defined on a system wide basis – that is they may cut across any circulation meta institution boundaries. This allows for some complexities in the implementation of the online credit/debit card payment module. Of course, for any individual borrower, that borrower belongs to one meta institution for circulation only and therefore any charges visible only apply to a single meta institution.
Selection of the Financial groups option results in a standard grid listing such as:
In this example, we have a single main organisation and in addition we have a schools library service. Although these two organisations share a single circulation system, loan fees and overdue fines “belong” to the organisation at which the items were issued.
: select this option to add a new financial group. See section 497.3.1.
: select a code and then this option to modify the financial group. See section 497.3.1.
: select a code and then this option to delete the financial group. The system will prompt for confirmation.
: Use this option to add account codes for a group. See section 497.3.2.
:select a code and then this option for the setup of additional parameters to be passed to an online payment broker (e.g. BucksNet), optionally, according to the language of the WebOpac or current client settings.
: Use this option to add charge groups for a group. See section 497.3.3.
: Use this option to maintain IFS codes for a group. See section 497.3.4.
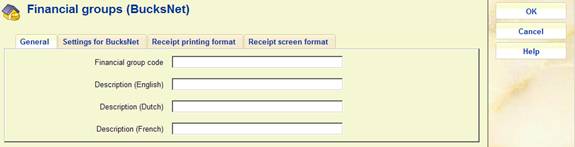
: select this option to add a new financial group. After choosing this option an input form will be displayed:

Financial group code: enter an appropriate code.
Description: enter a brief description for each language.
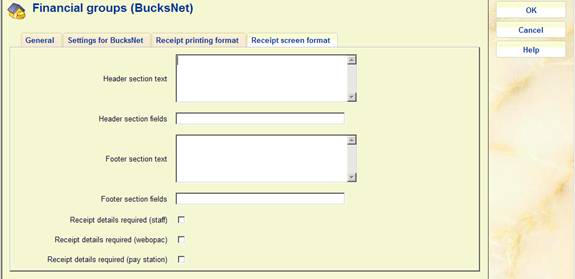
If electronic payment (via Bucksnet) is activated, the input form will look like this:
Financial group code: enter an appropriate code.
Description: enter a brief description for each language.

Settings for BucksNet: The “Settings for BucksNet” are described elsewhere and need not be setup unless online credit card payment is required. See the credit card payments general help for more information.

The “Receipt details required” options at the bottom of the form are used simply to enable or disable the itemised formats. If the formats are disabled then the regular simple payment total format will be used for receipts. If the option is enabled then the information shown in the other 4 sections on this form will be used to create the required receipt format.
Each of the 4 sections used for printing will be separated by a line of “-“ characters automatically.
The “Header” and “Footer” sections contain free format text sections and these will be simply output as entered. The “Header” and “Footer” named fields sections will be output as a 2 column table with the field name in the first column and the field value in the second column.
Named fields available in these sections are as follows
· <date> Payment transactions date
· <time> Payment transaction time
· <name> Borrower name
· <desc> Wording for credit card receipt (Bucksnet parameter)
· <borrower> Borrower barcode
· <receipt> Transaction ID
· <amount> Total payment amount (May also appear in details section)
The “details” section will be used to format the item level details that are printed on the receipt. There are 2 “types” of information in this section.
· Data alignment information.
A single line in the format =Xnnn=Xnnn=….=Xnnn=
Where
X is either L (left justified), R (right justified) or M (money amount field – right justified)
nnn column position for output value
· Data field names.
A single line in the format <field1><field2>…..<fieldN>
Where
<fieldN> is the field name of the value to be output in the corresponding position in the alignment definition.
Current field names available for use are
<itemcount> No of items covered by this transaction
<itemdesc> Item charge description
<itemcode> Item charge VAT code
<itemrate> Item charge VAT rate
<itemamount> Item total amount (including VAT)
The “summary” section will be used to format the subtotals and total details that are printed on the receipt. The same 2 “types” of information entered in the “details” section are also used in this section. The only difference being the field names used.
Current field names available in this section are
· <totalcode> VAT rate code
· <totaldesc> VAT rate description
· <totalrate> VAT rate
· <totalamountInc> Payment total inclusive of VAT
· <totalamountEx> Payment total exclusive of VAT
· <totalamountVat) Vat amount (calculated as <totalamountInc>-<totalamountEx>)
The “Receipt screen format” parameters are handled in a similar manner even though there are only options to configure the layout for the “header” and “footer” sections of the layout. The item details and VAT summary sections are fixed and are applied to the receipt screen window display. This same receipt screen is used for the web browser receipt printing. The three option buttons that appear on the receipt screen when accessed via a staff PC will be in fixed positions at the bottom of the window display following the parameter driven sections. Only 2 option buttons will appear when the receipt screen is accessed via a web browser session. The print receipt option will be suppressed since only the print screen and close window options will be applicable.
In each of the formats the itemized charge description will be taken from the wording or charge type information shown on the financial group ifs code management screen accessed via AFO 497 – financial groups.
The number of items that make up this transaction may be output as part of the description if required by prefixing the <itemdesc> field with <itemcount>. The pair of values will then appear in the description column in a similar fashion as used on the transaction payments screen accessed from a borrower record.
Each location (library branch) can be associated with an account code. Select a group and then the option to add account codes for the group group. A summary screen will be displayed:
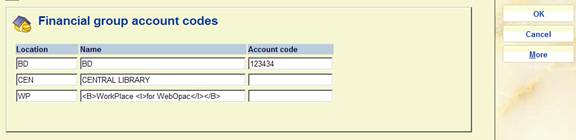
This shows ALL the locations in the system – and only the Account code may be edited by typing data in the column Account code.
When each individual charge is identified, the account code is determined from the Charge Location. This is the location to which the money is notionally owed, as defined in the Charges By Location settings in AFO 497.
The charge location is explicitly set (if defined in AFO 497) when the charge is actually raised. There are two exceptions to this – if the charge was raised BEFORE the charges by location settings were assigned, or if the charge location is set to “no specific location”, then an explicit charge location cannot be assigned.
In this case, the Charge Location will be assigned to the borrowers home location. (And if for any reason this is not determined, then an error report is made and the charge location is determined from the location at which the charge was originally raised).
Once the location associated with the transaction has been determined the appropriate account ID will be used.
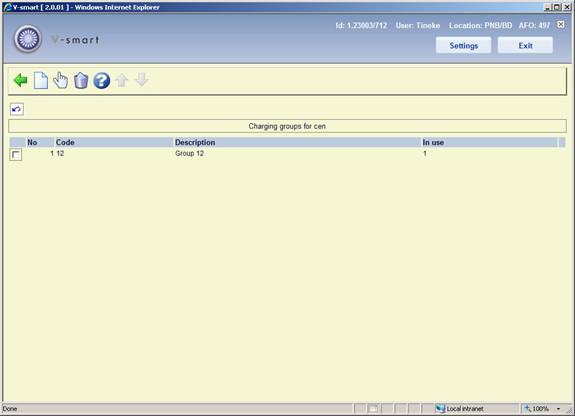
For reporting purposes as part of the income management functionality, different types of charges may be grouped together. Charge groups are defined for each financial group – thus one financial group may group charges together in a way different from another group. Select a group and then the option to add charge groups to the group. An overview screen will be displayed:
: Use this option to create a new charge group. See section 497.3.3.1.
: Select a line and then this option to view / modify the details of the charge group. See section 497.3.3.1.
: Select a line and then this option to delete the code. The system will prompt for confirmation.
After selecting the option or an input form will be displayed:

You can enter a Charge group code and Description. For an existing entry only the field Description may be modified. The "In use" flag suppresses the code from being offered in the charges setup screen.
For reporting purposes as part of the income management functionality, different types of charges may be grouped together, then individual charges are linked to the group with the option . After selecting this option an overview screen will be displayed:

This screen is "predefined" and consists of four sets of entries
· The first part consists of the "standard" charge types in the system – overdue fines, charges for reservations, loan fees and so on.
·
The second part consists of the surcharge details line. A ![]() icon will appear next to the surcharge line.
icon will appear next to the surcharge line.
·
The third part consists of the codes defined for miscellaneous payments and refunds – so that VAT codes (etc.) can be associated with these types of payment/refund. A ![]() will appear next to these items. The use of these payments types is defined elsewhere as part of income management.
will appear next to these items. The use of these payments types is defined elsewhere as part of income management.
·
The fourth part consists of the specific Sales Item codes – VAT rates, IFS codes and so on are specific to the type of "sale" that is being processed. A ![]() icon will appear next to these items. In addition, this may also show "archived" sales item codes – since it is possible that these WERE used but are no longer. A
icon will appear next to these items. In addition, this may also show "archived" sales item codes – since it is possible that these WERE used but are no longer. A ![]() icon will appear next to these items.
icon will appear next to these items.
The four different sections are distinguished by the icons shown in the left hand column.
After selecting an entry form the list an input form will be displayed:

Charge: This is for display purposes only.
Group: allows this specific charge type to be linked to one of the groups as defined under Charge groups.
Tax code: as defined in the separate VAT rate table (defined elsewhere in AFO 497).
IFS code: is a free form coding – the Finance systems coding for this type of charge. There is NO validation of this field.
Wording: an additional wording for this type of charge to be used on the income management reports.
Note
If new Sales item codes are added to the system, then the new code will appear in the table above automatically; users MUST remember to update the associated codings in this table as well.
Finally, it is necessary (if financial groups have been implemented) to link a location to a financial group. A simple setting tells the system to which financial group a location belongs.
After choosing this option an input form will be displayed:

This menu option allows a report to be run cross-referencing the locations at which a charge is paid against the location at which it was owed and is described later on.
The reconciliation report is designed to identify payments made at locations other than the location to which the charge was owed – in other words, it allows the library to determine that branch A, for example, took £212.50 which actually belongs to branch B.
The processing allows for a number of runtime options. Since it is expected that the report would be run at regular intervals, the standard ”Save Settings” option allows a regular “production” set of options to be setup once and used subsequently.
After choosing this option an input form will be displayed:

Name for this run: This field simply allows a “name” to be attached to the report for identification purposes.
Start date, End date: These two define the period for which payments are selected. In addition to a usual specific date, Start Date may be set to “Date of last run” where this is specific to the current user. End date may be set to “Today” or perhaps more usefully “Yesterday”. Thus for example, useful settings saved for these would be “Date of last run” and “Yesterday”.
Group by location: The location for a charge is defined at the Institution/Location level. Rather than breaking down the report for each location, the “group by” setting allows you to aggregate payments according to the location, institution or financial group.
(Thus, for example, we might simply report “Institution X owes institution Y a total of £345.23”, rather than “Location X/Alpha owes Location Y/Gamma £2.50, and Location X/Beta owes Location Y/Delta £4.87” and so on.).
Level of detail by date: Valid settings are “by day”, “by week”, “by month”, “by year”, “whole period”. Thus for example, if the report is “by day”, then a figure is given for each day in the period selected; whereas, for the whole period, a single figure is given.
Include figures where charge location equals payment location: This option allows you to include payments which were actually paid at the right location. In other words, you can report on all charges or just those for which the locations are different. In this case, the location means the location as defined by the “group by” setting. That is, if you group by institution then a charge paid at, say, “Avon County/Central” and “Avon County/West Branch” are considered to be the same location (whereas if grouping by Location, these would not)..
Note
Only one report per meta institution for circulation may be in process at any one time, and only one user may access this screen (per meta institution for circulation) at any one time.
The top lines show the most recent run – if it is in progress, then the “Completed line” will show “In progress”; or, if no report has been run, then the text “No previous reports” will be shown. Also shown are the last details for the current user, if these are different from the last overall run.
Clicking initiates the selection run. This brings up the regular ‘start process' form.
Reports can therefore be run on a regular basis by setting the job as a permanent “in memory” process –although this probably only makes sense for a job for which the start and end dates are set to “Date of last run” and “Yesterday”.
When a report is completed, the “output results” command will output the results to a spreadsheet.
It should be noted that although an individual user's date of last run and previous settings are saved on an individual basis, there is only one report current for any circulation meta institution; submitting a run will overwrite the results of a previous run.
Initially output will be only available as a .csv format file for importing into a spreadsheet.
Output fields are
· Charge Location
· Payment Location
· Charge period
· Charge type
· Payment type
· Payment type wording
· Total amount
Charge and payment location correspond to the “group by” setting (i.e. financial group, institution or location). Location will appear in the form XXX/YYY.
Charge period corresponds to the grouping. It will be in the form dd/mm/yyyy for by day, 2005.01 – 2005.53 if grouping by week, 2005.01-2005.12 if grouping by month.
Payment type will be the payment type code letter i.e. A – Y (as in the table in section 5.3.2); payment type wording is the “translation” of this code (in the current language of the user submitting the report).
Total amount will be the total paid amounts, totalled by the grouping period.
When the results are output, a spreadsheet will automatically open with the results – for example:

This can be used to generate the necessary reconciliation totals – for example, by using a Pivot Table we might get

showing that CEN owes BD 1.50, and BD owes CEN 1.25.
The BucksNet reconciliation report shows all transactions with errors attached to individual lines. In addition error lines are output to a separate file. Where the main report is called BucksNetRpt_20070903_1.txt, the "Rpt" is replaced by "Err" e.g.: BucksNetErr_20070903_1.txt
See the credit card payments general help for more information.
After choosing this option a submenu will be displayed:
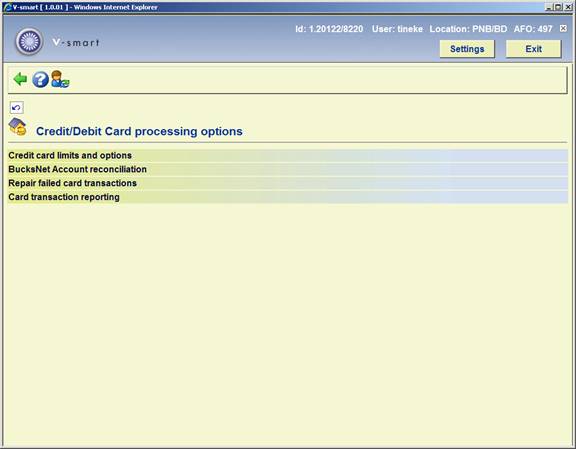
The menu options will be discussed in the next paragraphs.
After choosing this option an input form will be displayed:

Credit card payments available: A check box, which can be used to turn the credit card payment options off or back on for the system as a whole.
Service provider: This is a combo box with one of the following options:
· None
· BucksNet
· iDEAL
Note
This is a SYSTEM wide setting. For the system as a whole only one payment service provider may be selected- if there are separate organisations (accounts) then they may have separate accounts BUT they must all use the same service provider. It would be possible to change from one service provider to another in the lifetime of the system (but would be for all users, and of course there are some practical considerations when a service provider is changed, not just for V-smart).
The Payment system in use may be changed from “none” to one of the others but may NOT be changed once set (field will become inactive).
It can, if necessary, be reset by Infor support staff.
Once the payment system is set then the settings and options will vary in detail for each service provider (and of course the way that the system “talks” to the service provider).
Minimum amount: a limit below which payments by credit card are not allowed.
Charge: an optional additional fee for paying by credit card.
Typically a charge is levied for the use of credit cards against the organisation receiving the payment. Allowance for this can be made by specifying a minimum amount below which it is simply not worth using a card OR by adding an extra charge for credit card payments.
Total charges across groups to borrower's location: An option to allocate charges for more than one financial group to the group for the borrower's home location (see below). Currently this is ALWAYS set and the system behaviour in this regard may not be changed.
Full URL for successfully processed transactions: This is a CSP page for processing the transactions – for BucksNet the CSP page will be: “BNTransactionSuccessful.csp”. In other cases put in X (because the field is mandatory).
Full URL for failed transactions: Similarly for failed transactions, for BucksNet this must be: “BNTransactionFailed.csp”. In other cases put in X (because the field is mandatory).
(These names are case dependent on Unix based servers)
The main reason for these last two parameters is to identify the name of the service associated – in the above example, it is set to “HTTP://LOCALHOST/VSDEVWEB/” and would normally be the same as that for the WebOpac.
All these settings are shared for the whole system. It is not possible to adjust these settings for an individual organisation or institution within the system.
This option gives access to the reconciliation reports.
Since the reports are grouped according to the financial group associated, this function lists only the reports that are relevant to the financial group associated with the current user's location. If the current location is not linked to a financial group then a message “No financial group has been defined for the current location” is displayed and the user is returned to the previous menu.
Entry to this function lists any reports visible in the destination directory for the associated financial group. This simple grid lists the report filenames and allows the reports to be printed.
In the event that something goes wrong between the time a user selects the Credit card payment” option and the actual payment (or failure), then the system will have recorded a transaction started but not completed.
The payment may or may not have gone through – and will be reported above.
In this event, the transaction must be “undone” – effectively as if the payment failed. If the payment DID go through (but the success of this never reached V-smart) then the payment must be made manually in the online.
In the online, a payment “in progress” is reported by an indication (in brackets) of the service, date and time of the transaction. Of course, this may be displayed on a screen other than the one carrying out the payment, so it may be legitimate to see this.
In the even that there WAS a problem with the card transaction, then a staff member can only tell whether the transaction went through or not from the BucksNet reconciliation report, available the next day typically.
Using the information from the report, staff should use the “Repair Failed transactions” function to correct any such borrower data “in limbo”.
Finally since a card payment MAY cover more than one borrower's charges, repairing the data for one borrower will cause the system to straighten out the charges for each borrower on the transaction. If this will happen, then a summary (names and barcodes) of the other borrowers will be displayed, for information.
V-smart will allow the generation of a report in more or less the same format as that of the service provider, so that the two reports can be matched to cross check what V-smart “thought” had happened with what is recorded on the service provider's system.
After selecting this option an input form will be shown:
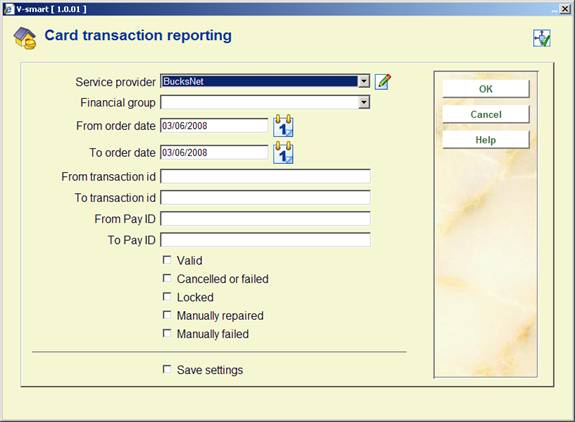
Fill in the required criteria and check which types of transactions you want to report on. After clicking , an overview screen will be presented.
This overview can then be compared to the report supplied by the service provider.
Tax indicators are used to hold VAT codes, descriptions and their rates. The tax indicators are stored at the system level and shared by all financial groups.
After selecting this option an overview screen will be displayed:

: Use this option to create a new tax indicator. See section 497.7.1.
: Select a line and then this option to view / modify the details of the tax indicator. See section 497.71.
: Select a line and then this option to delete the code. The system will prompt for confirmation.
After selecting the option or an input form will be displayed:

A Tax indicator may be of any length but only the first character will be output in the export file due to export file field size restrictions. Description and Rate are for information purposes only.
· Document control - Change History
|
Version |
Date |
Change description |
Author |
|
1.0 |
June 2008 |
creation |
|
|
2.0 |
November 2009 |
new options under Financial groups; new options for Bucksnet; new options for VAT summary reporting; new menu option Tax indicator settings |
|